 |
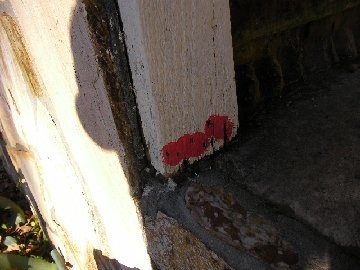
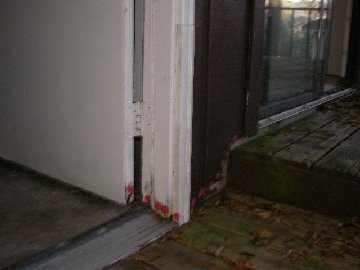
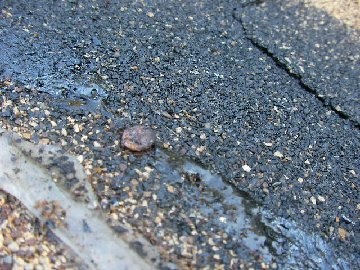
The Pest Control Company came to the house for a WDO Inspection (Wood Damaging Organisms) for the property which was Under Contract for Sale.......which include Woodrot, Mold, Mildew, Termites, Carpenter Bees, Delaminating Wood, and a myriad of other things that can go wrong with a wood house...and some on the brick house. Our FAVORITE Termite Company always 'marks' the spots they find with a RED BLOTTER...which helps us in our investigation for Proposal. Here, the bottom of the Cedar Trim is soft with woodrot... |
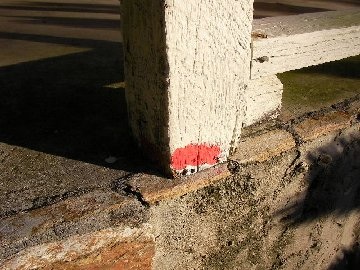 |
Here the bottom of the porch post is soft.... NOW, don't let 'cedar' fool you. It is 'Moisture and Bug RESISTANT"...but not 'PROOF'. It must be maintained just like any other wood product. Caulking and Paint....or it will rot. |
 |
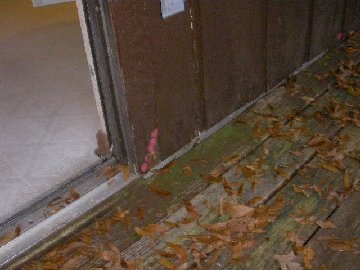
this is the lower side of the Garage Door frame and door stop...solid cedar...but rotted from water 'wicking' up from the bottom. |
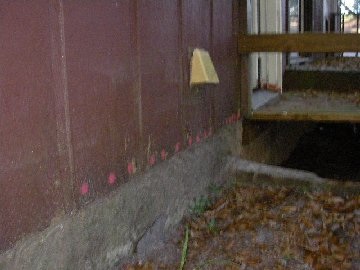 |
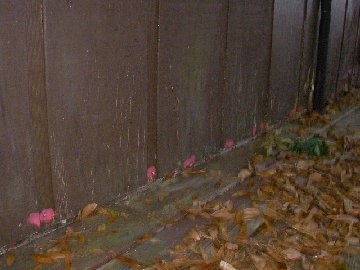
and around the back of the house...we are riddled with Woodrot on the T-1-11 Pine Siding. Water that was splashing off of the roof caused this rot to happen. The Termite Inspectors will probe with a tool as they walk around the house scanning all the areas of usual concern. |
 |
Yep..and the bottom of the door core...door frame...and door trim....water splashback is always a bad culprit. |
 |
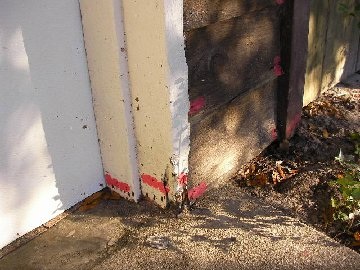
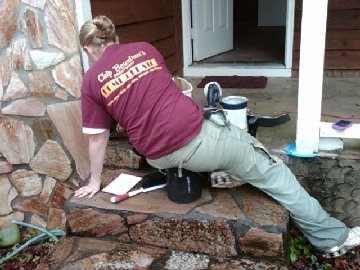
and here is the 1" x 4" cedar trim board...riddled with soft rot... |
 |
and right above the decking boards... |
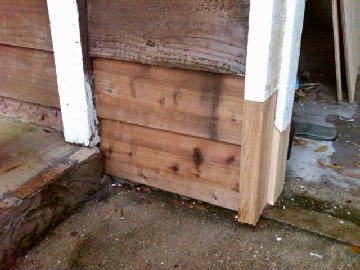 |
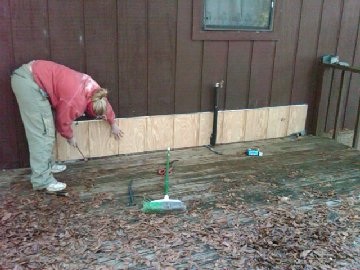
After Tiffany and Bobby cut out the bad Cedar Bevel Siding, they also staggered a cut on the Door Jamb (2" x 6" Rough Cedar) and Door Stop (1" x 4" Rough Cedar) and inserted the 'new' cedar beveled planks... |
 |
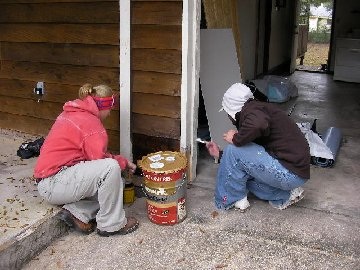
Tiffany went to grinding and filling on the bottom of the porch posts.... |
 |
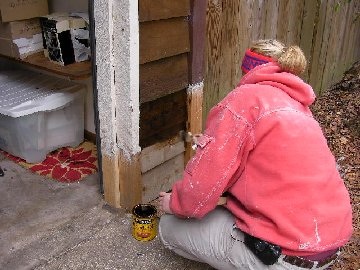
and here you can see the epoxy resin all 'wirebrushed' (to create a woodgrain effect) and ready for paint. Solid as a rock...and won't rot or deteriorate. |
 |
now they are Painting the trim and staining the cedar.... |
 |
and now Tiffany goes to the other side and starts to stain the cedar........notice the epoxy in the seams of where they inserted the new wood. That is to 'hide' the seam to keep it uniform looking.... |
 |
they use a special saw to cut out the bad T-1-11 pine siding and then get ready to insert the Z-Flash into the bottom of the remaining siding...this will 'watershed' the water past the top of the new siding, in which we align the grooves...and then tuck the siding 'under the lip of the Z-flash...' |
 |
Tiff is doing the final nailing |
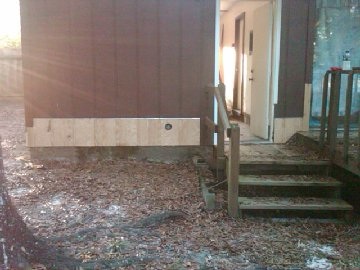 |
and you can see the new siding on the left side...then we have cut the Brickmold on the right of the doorway...and siding and trim on the right of the doorway.....'GET ER DUN!' |
 |
all done...and we got the computer color match and painted away...just blended, the match was great! We did the doorways also...... |
 |
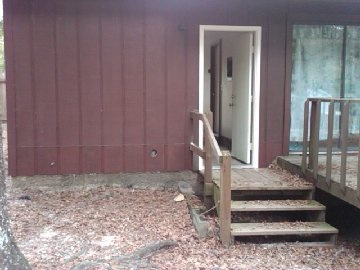
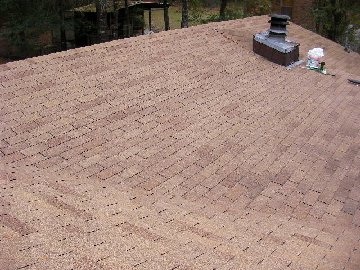
and on top of the deck...all was good. The Termite Guy came back and reinspected....and "A+ Rating" |
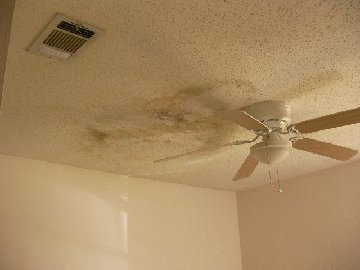 |
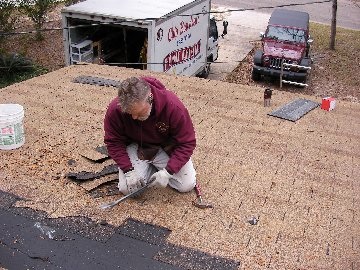
We got The Old Man (Chip) up on the roof, to use his Roofing Skills..(no one does a roof repair like he does...he used to teach it in the Military)..and we were tasked to remove and replace the sheetrock in the ceiling because of mold... |
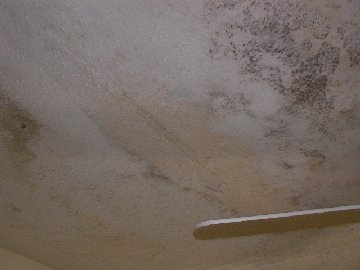 |
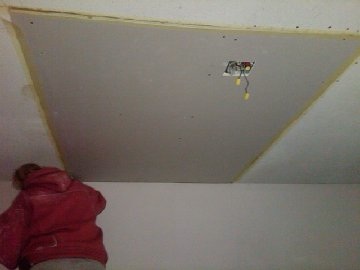
here you can see the black and red mold...what a mess...but another "opportunity to Excell!" |
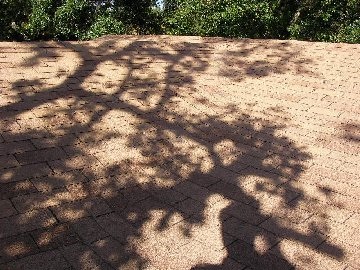 |
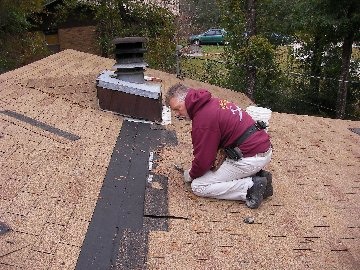
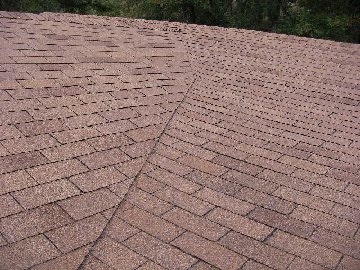
Chip knew the Valley was suspect...as soon as he got on the roof...This is a NEW roof, but only the Qualified Roofing Contractor's know how to 'lay a Valley'...... |
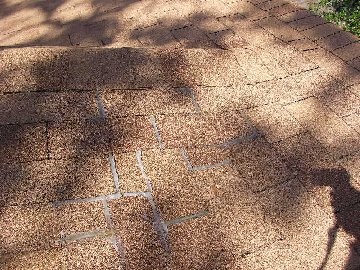 |
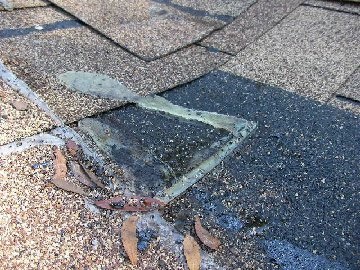
You can also see that they must have had leaks right off the bat! Fresh Silicone in all the joints...bad deal! |
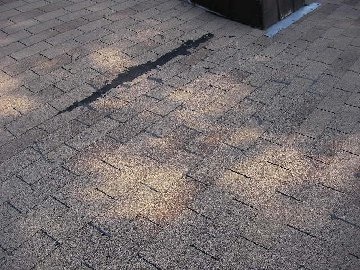 |
and then someone dumped Tar on a 'transition' where one roof pitch...'changes' to another pitch....an usual problem area for the Novice roofers... Sometimes 'experience' is worth the cost. |
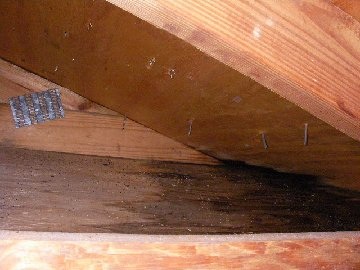 |
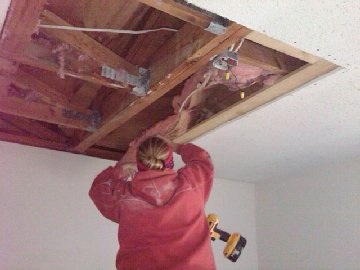
Bobby and Tiffany open up the Sheetrock...being careful to contain the mold and dispose of it...then we peek up into the attic and see the water stains.......Dead in the middle of the Valley... |
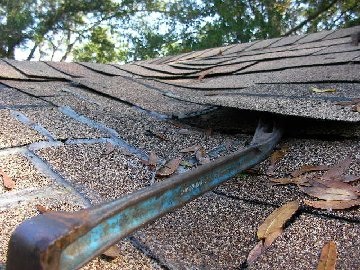 |
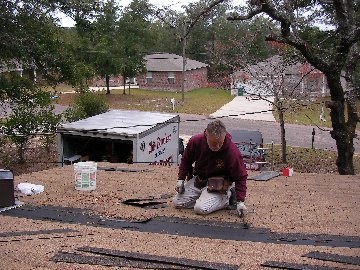
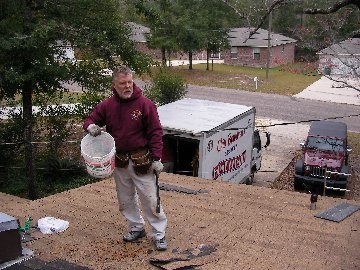
The old guy get's his pouch on and grabs his prybar... We have a deadline....RAIN IS COMING..... |
 |
he peels out layer after layer of shingles...and see's what the other roofers did...wonder what their license was in..? |
 |
and then he sees the water dammed up under the shingles...and rusted roofing nails..........remember, this roof is only a couple months old....... |
 |
He's thinking of the 3 back operations he's had....and the injections in his neck...and he outta be driving that Jeep on a 4-wheel trail....oh well,,,,,,
|
 |
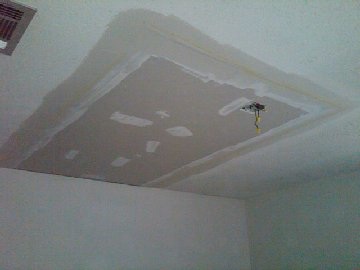
Tiffany and Bobby start putting in the insulation...did I mention that there was NO insulation...hummm, NOW there is.... They put ledger boards into the sheetrock...and screw them in...it provides the best surface for the new sheetrock...instead of having to try to screw on the edge of the sheetrock onto a 3/4" surface...now they have 2 3/4" surface to screw to.....these troops are ingenious.... |
 |
and the new rock is put up...and webbing tape is applied....and 1st coat of FastSet HotMud is applied (20 minute drying time). Then we will WET SAND it with Scrubby Sponges (hey, NO dust!) and get it prepped for Priming (yes, we DO prime the sheetrock before spraying texture...another 'ingenious' idea from the Bobby/Tiffany team... |
 |
and the 'elf' is still up there roofing...all by his lonesome. He is using a combination of Peel N Seal "Weatherwatch" that is sticky rubber...and has 'sealed' the transition and valley prior to nailing. The new nails will drive thru the sticky Rubber..and seal. Geez, this guy should write a book~ |
 |
here you can see the Peel N Seal over the transition...the only way to properly do the roof...the bottom of the seal is about where his foot is...he's quickly shingleling up to beat the oncoming rain... |
 |
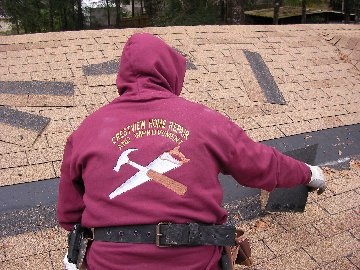
Yes, a Left-Handed roofer (hey, he's a Middle-Child too). Getting close to the end.. |
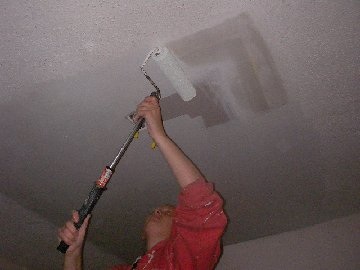 |
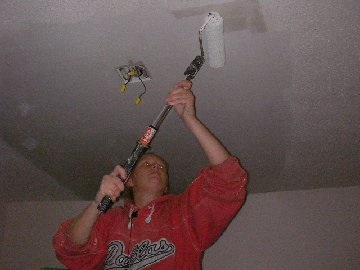
Bobby is prepping the Texture, and Tiffany is painting the primer on the new sheetrock.... |
 |
a lot of contractor's skip this step....that's why you have the 'Popcorn' falling down on humid days....we also mix the Ceiling White Paint in with the Texture and Stir...because that's what the instructions say to do..it's the 'bonding' agent that keep's it from falling........good trivia...excellent standards! |
 |
He did it....there is the new French-Cut Valley....and the Transition is now smoother,and both are underlay'd with Peel N Seal |
 |
Remember, no nails within 12" of the valley...this is where the Asphalt Sealant comes in. You place it under the shingles within 12"...and you got a A+ roof valley for years to come. See where the Transition Changes the Pitch of the Valley..? You had better know how to use the sealant under the shingles there! |
 |
and here is standing on the Ridge...looking down on the Valley...and the Transition to the Chimney....and I feel the Rain Drops...! Where did the old roofer go...? |
 |
His bucket is empty...and gas tank is low.... |
 |
Here Tiffany is applying the Web Fiberglass Tape to prep the sheetrock for application of Special Set "Hot Mud" that dries in 20 minutes...vs 20 hours.... |
|
Here is the first coat setting up....you have to move fast with this stuff... |
|
after Wet-sanding for the 2 coats...we applied the Primer to the sheetrock and then mixed Ceiling White into the Medium Texture...and shot it using a compressor and Hopper Gun.......Blending Mahem into Magic... |
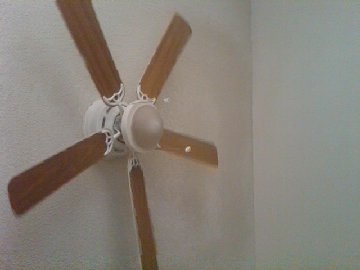 |
and while the texture is drying (goes from a Khaki tan to a lotus white in 24 hours), Bobby reconnected the Ceiling Fan. |